How to Turn AI Images into Editable PowerPoint Slide
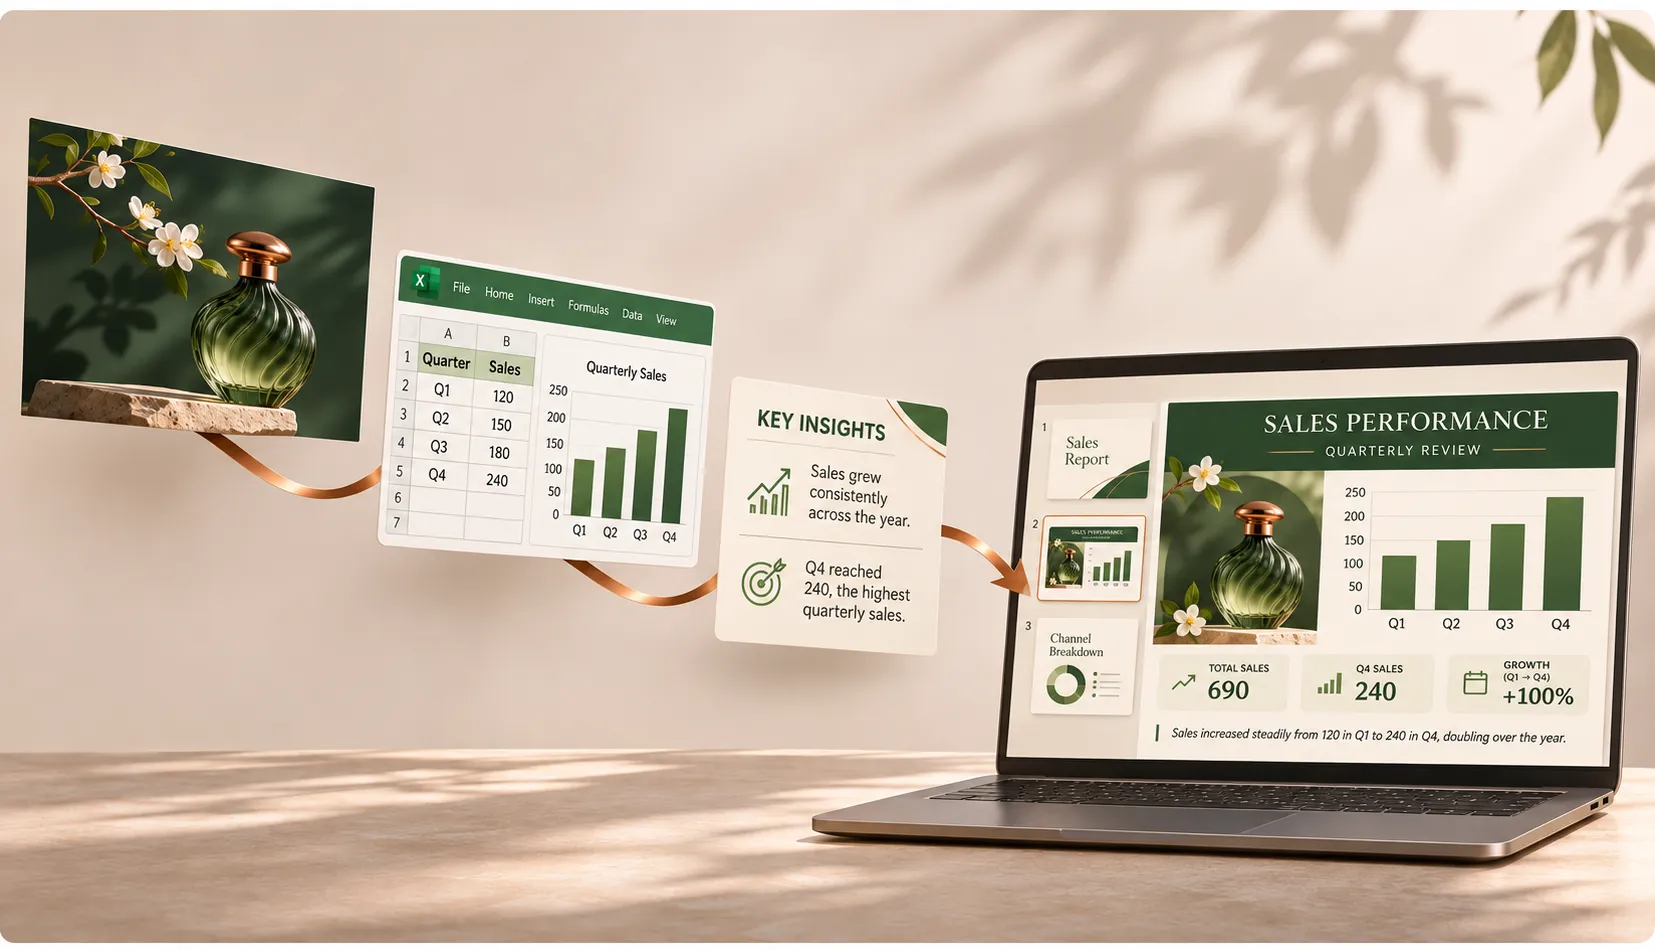
A cover that looks like a brand campaign. Product pages with carefully crafted lighting. A presentation that feels like a beautifully designed magazine. AI can help you create this kind of visual impact, but two practical questions remain: which tool should you use to generate the pages, and how do you turn the resulting images into a presentation you can actually deliver?
There are two main approaches. You can generate slide images with an image model, then package or reconstruct them with a separate tool. Or you can use Pi Creative PPT to plan, generate, edit, and export the presentation in one workflow.
Approach 1: Generate the Images, Then Convert Them
1. Understand What an Image-Based Presentation Is
An image-based presentation uses one fully designed image as each slide. Backgrounds, illustrations, headings, and body text can all be baked into that image before it is placed in a PowerPoint file.
The main advantage is visual consistency. Because typography, lighting, and decorative details are part of the image, opening the deck on another computer is less likely to disrupt the layout through missing fonts.A PPTX file is not automatically editable. An image placed inside a PPTX remains an image. Its heading does not become a text box, and a chart pictured in it does not become a chart with editable data.
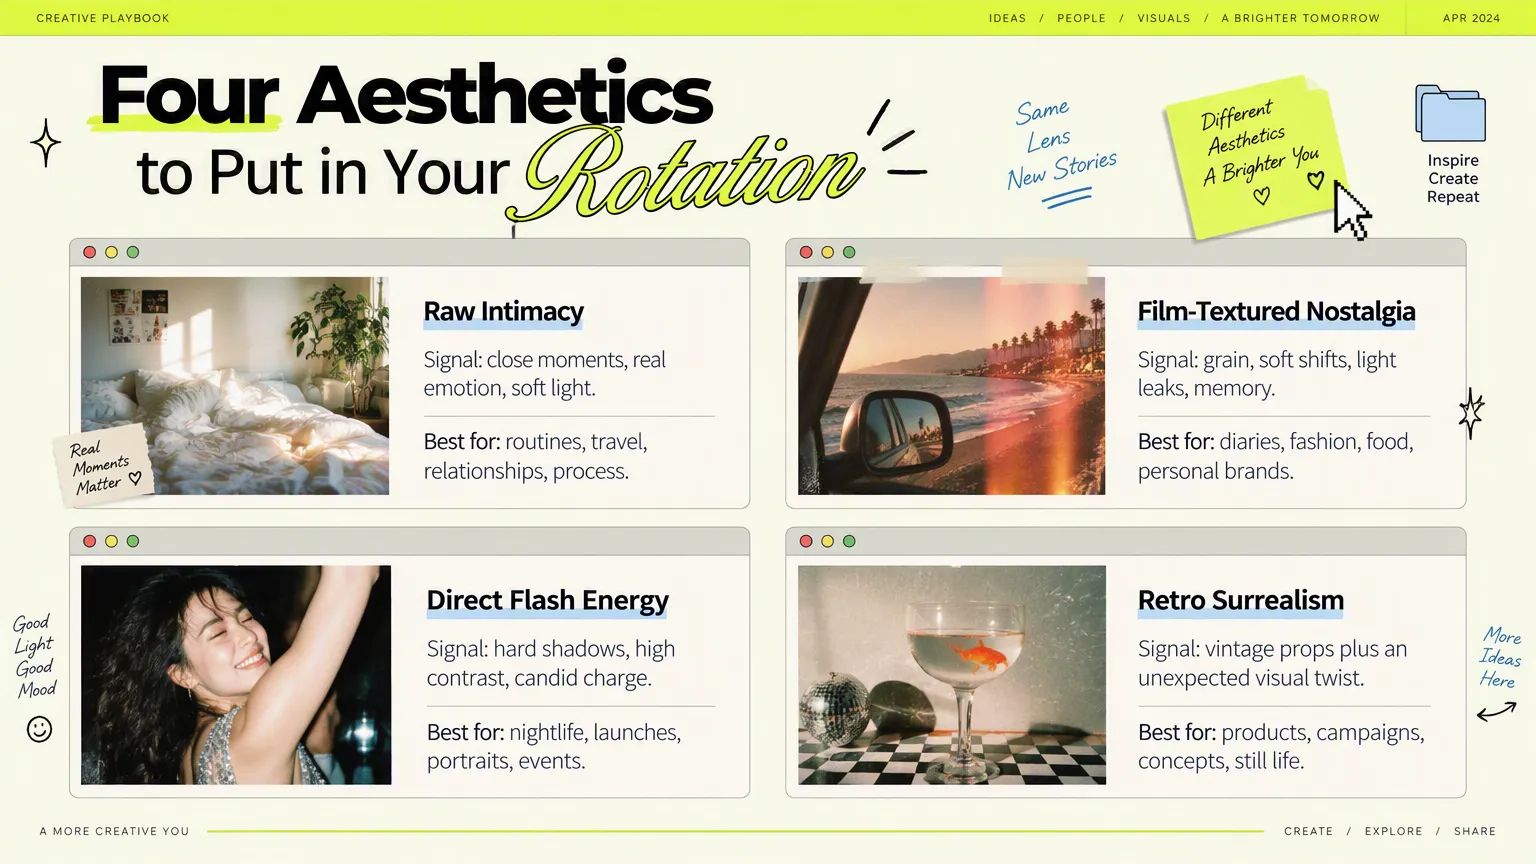
This format works well for brand presentations, storytelling, and concept pitches. Financial reports, frequently updated business metrics, and lessons that need individual animations are usually better served by editable text and charts.
2. Choose an Image Model for the Job
Start with what the slide needs: a complete page with text, or a strong visual that you will add text to later. The following is a practical selection guide, rather than a benchmark ranking.
| Model or family | Good starting points | How to use it | Check before delivery |
|---|---|---|---|
| Nano Banana Pro (Gemini 3 Pro Image) | Information slides, diagrams, and full-page layouts with headings | Specify the structure and exact copy; supply a style reference | Text, numbers, labels, and logical relationships |
| OpenAI GPT Image family | Detailed visual briefs, reference-image edits, and iterative refinement | Work in rounds, changing one priority at a time | Small text and unintended changes elsewhere |
| Midjourney | Cover imagery, brand mood, and concept illustrations | Generate the artwork, then add final text in a presentation editor | Space for titles and the correct aspect ratio |
Nano Banana Pro: A Starting Point for Integrated Text and Visuals
Google describes Nano Banana Pro as supporting infographics, diagrams, multilingual text rendering, reference images, and creative controls—capabilities that fit the task of generating a complete slide image.
For example, ask for a product page with a heading, three benefit blocks, and a product visual. Specify what belongs in each block, how much text it contains, and where the empty space should be. That is more actionable than simply asking for something “premium.”
You can start through Gemini’s image-generation interface. Available models, resolutions, and usage allowances depend on your account and the current interface.
GPT Image: Refine a Clear Design Brief in Stages
The GPT Image family is useful when you have specific instructions: keep the product unchanged, replace the background with warm ivory, and move the subject right to leave space for a heading on the left.
OpenAI documents image generation, reference-based editing, and iterative changes. For presentation work, this lets you establish one visual reference and refine subsequent pages around it.
Make small changes: composition in one round, color in another, then a text check. Changing the style, title, chart, and subject position all at once makes it harder to identify what went wrong.
Midjourney: Build Covers and Hero Visuals
For brand stories, architecture concepts, travel talks, and product launches, use Midjourney to create expressive imagery, then add the final heading and body copy in PowerPoint or Canva.
This is particularly helpful when the copy will change later. Ask for text space from the outset—for example, “Place the product on the right and keep the left background clean.” Otherwise, your title may end up covering the subject.
3. Set the Rules Before Generating the Deck
A striking individual slide is easier to achieve than a coherent ten-slide presentation. Start with a content structure and a shared visual brief instead of inventing a new style prompt for every page.
Step 1: Give Each Slide One Main Job
A six-slide fragrance-brand proposal might follow this structure:
- Cover: express the brand promise in one sentence.
- Lifestyle: show where the product fits into everyday life.
- Product concept: explain the relationship between scent and design.
- Key benefits: communicate value in three short blocks.
- Collection: compare products or use cases.
- Closing: give the audience a clear next step.
Keep each page focused. An image model can produce a complex composition, but that will not make a dense paragraph easier to read. Cutting copy often helps more than adding decoration.
Step 2: Write a Shared Visual Brief
Define a landscape 16:9 canvas, core colors, typographic character, title placement, whitespace, and image style. Choose a clear, high-resolution export where available; 1920 × 1080 or a larger image with the same proportions is a useful starting point. Aspect ratio and resolution are different: 16:9 alone does not guarantee sharpness.
Adapt this prompt to your own project:
Create one complete image that can be used directly as a presentation slide.
Topic: [new fragrance collection proposal].
Audience: [brand partners].
Canvas: landscape, 16:9, with safe margins on all sides.
Visual direction: deep forest green, warm ivory, and subtle copper accents; natural light; clean editorial design.
Layout: heading and three short points on the left, product hero image on the right; generous whitespace.
Render this heading exactly: “Add a Layer of Scent to Everyday Life”.
Render these three points exactly: “Inspired by Nature”, “Subtle Layers”, “An Everyday Companion”.
Do not add numbers, logos, or extra copy. Do not create a multi-page collage or a device frame.
If a reference image is provided, carry over its colors, lighting, and visual mood while following this slide’s content requirements.
Step 3: Approve One Page Before Expanding
Begin with the cover or a representative content slide. Once you are happy with its colors, text size, and information density, use it as a reference and reuse the same visual brief.
Check every page: Is the heading correct? Is the message clear at a glance? Does it belong to the same visual family as the previous slide? Pay particular attention to numbers, units, names, and chart labels. A convincing-looking chart is not proof that its data relationships are correct. Use real data and native charts for formal reporting.
Save files in order—for example, 01-cover.png, 02-lifestyle.png, and 03-concept.png—to simplify batch import.
4. Turn the Images into PowerPoint
The next step depends on whether you need to change anything inside the images. For presenting and sharing, package them directly into a deck. To revise the text or move individual elements, reconstruct an editable version first.
For a Presentation-Ready File: Use an AI Tool with File Generation
Tools such as ChatGPT can help assemble the deck in sessions that support presentation creation or file generation. Upload your numbered images and request one image per slide:
Arrange these images in filename order in a 16:9 PowerPoint presentation. Use one image per slide. Preserve each image’s original proportions without cropping or stretching. Generate a downloadable .pptx file.Capabilities depend on your account and the tools available in the session. The result is an image-based deck suited to quick presentation and delivery.
5. Rebuild Editable Content When You Need It
DeckEdit is an option for revising headings, body copy, and labels. Import a JPG or PNG, let OCR recognize the text, review the detected regions, then adjust wording, font size, and position before exporting to PPTX. It primarily rebuilds text as editable text boxes; charts and other graphics remain in the background.
SlidesPilot offers an “Image to Editable PPT” workflow for rebuilding more of the slide. Upload PNG, JPG, or WebP files in order, run the conversion, then open the exported PPTX in PowerPoint to refine the copy and layout. The tool aims to reconstruct elements such as text, shapes, tables, and images.
The workflow is straightforward: image → editable reconstruction → revisions → export. Check text, numbers, fonts, and alignment carefully. Complex graphics may not separate cleanly, and a reconstructed chart may not be a native chart with an underlying data source. Test one slide before processing the full deck.
Approach 2: Create and Export the Deck in Pi
Using separate image and conversion tools gives you control over individual visuals, but also leaves you managing outlines, page prompts, downloads, filenames, and reimports after revisions.
If your goal is a complete presentation, Pi Creative PPT brings content planning, page generation, review, and export into one workflow. It is suited to a request such as “Create a brand proposal I can present,” beyond generating a single attractive image. You still need to verify the facts and copy.
Step 1: Describe the Topic and Content
Open Pi, choose Creative PPT, and describe the subject, audience, and priorities. For example:
Create a new-product proposal for the fragrance brand Pixlayer, introducing three upcoming products to global brand partners. The target consumers are women aged 18–28. Focus on product positioning and marketing strategy.Upload brand materials, product photos, or reference documents if you have them. Pi can use these materials to plan the content, layouts, and theme colors.
Step 2: Set Your Generation Preferences
Specify the output language, approximate slide count, and visual theme as prompted. If you want to review the content and layout first, choose to preview the outline before generating the pages.
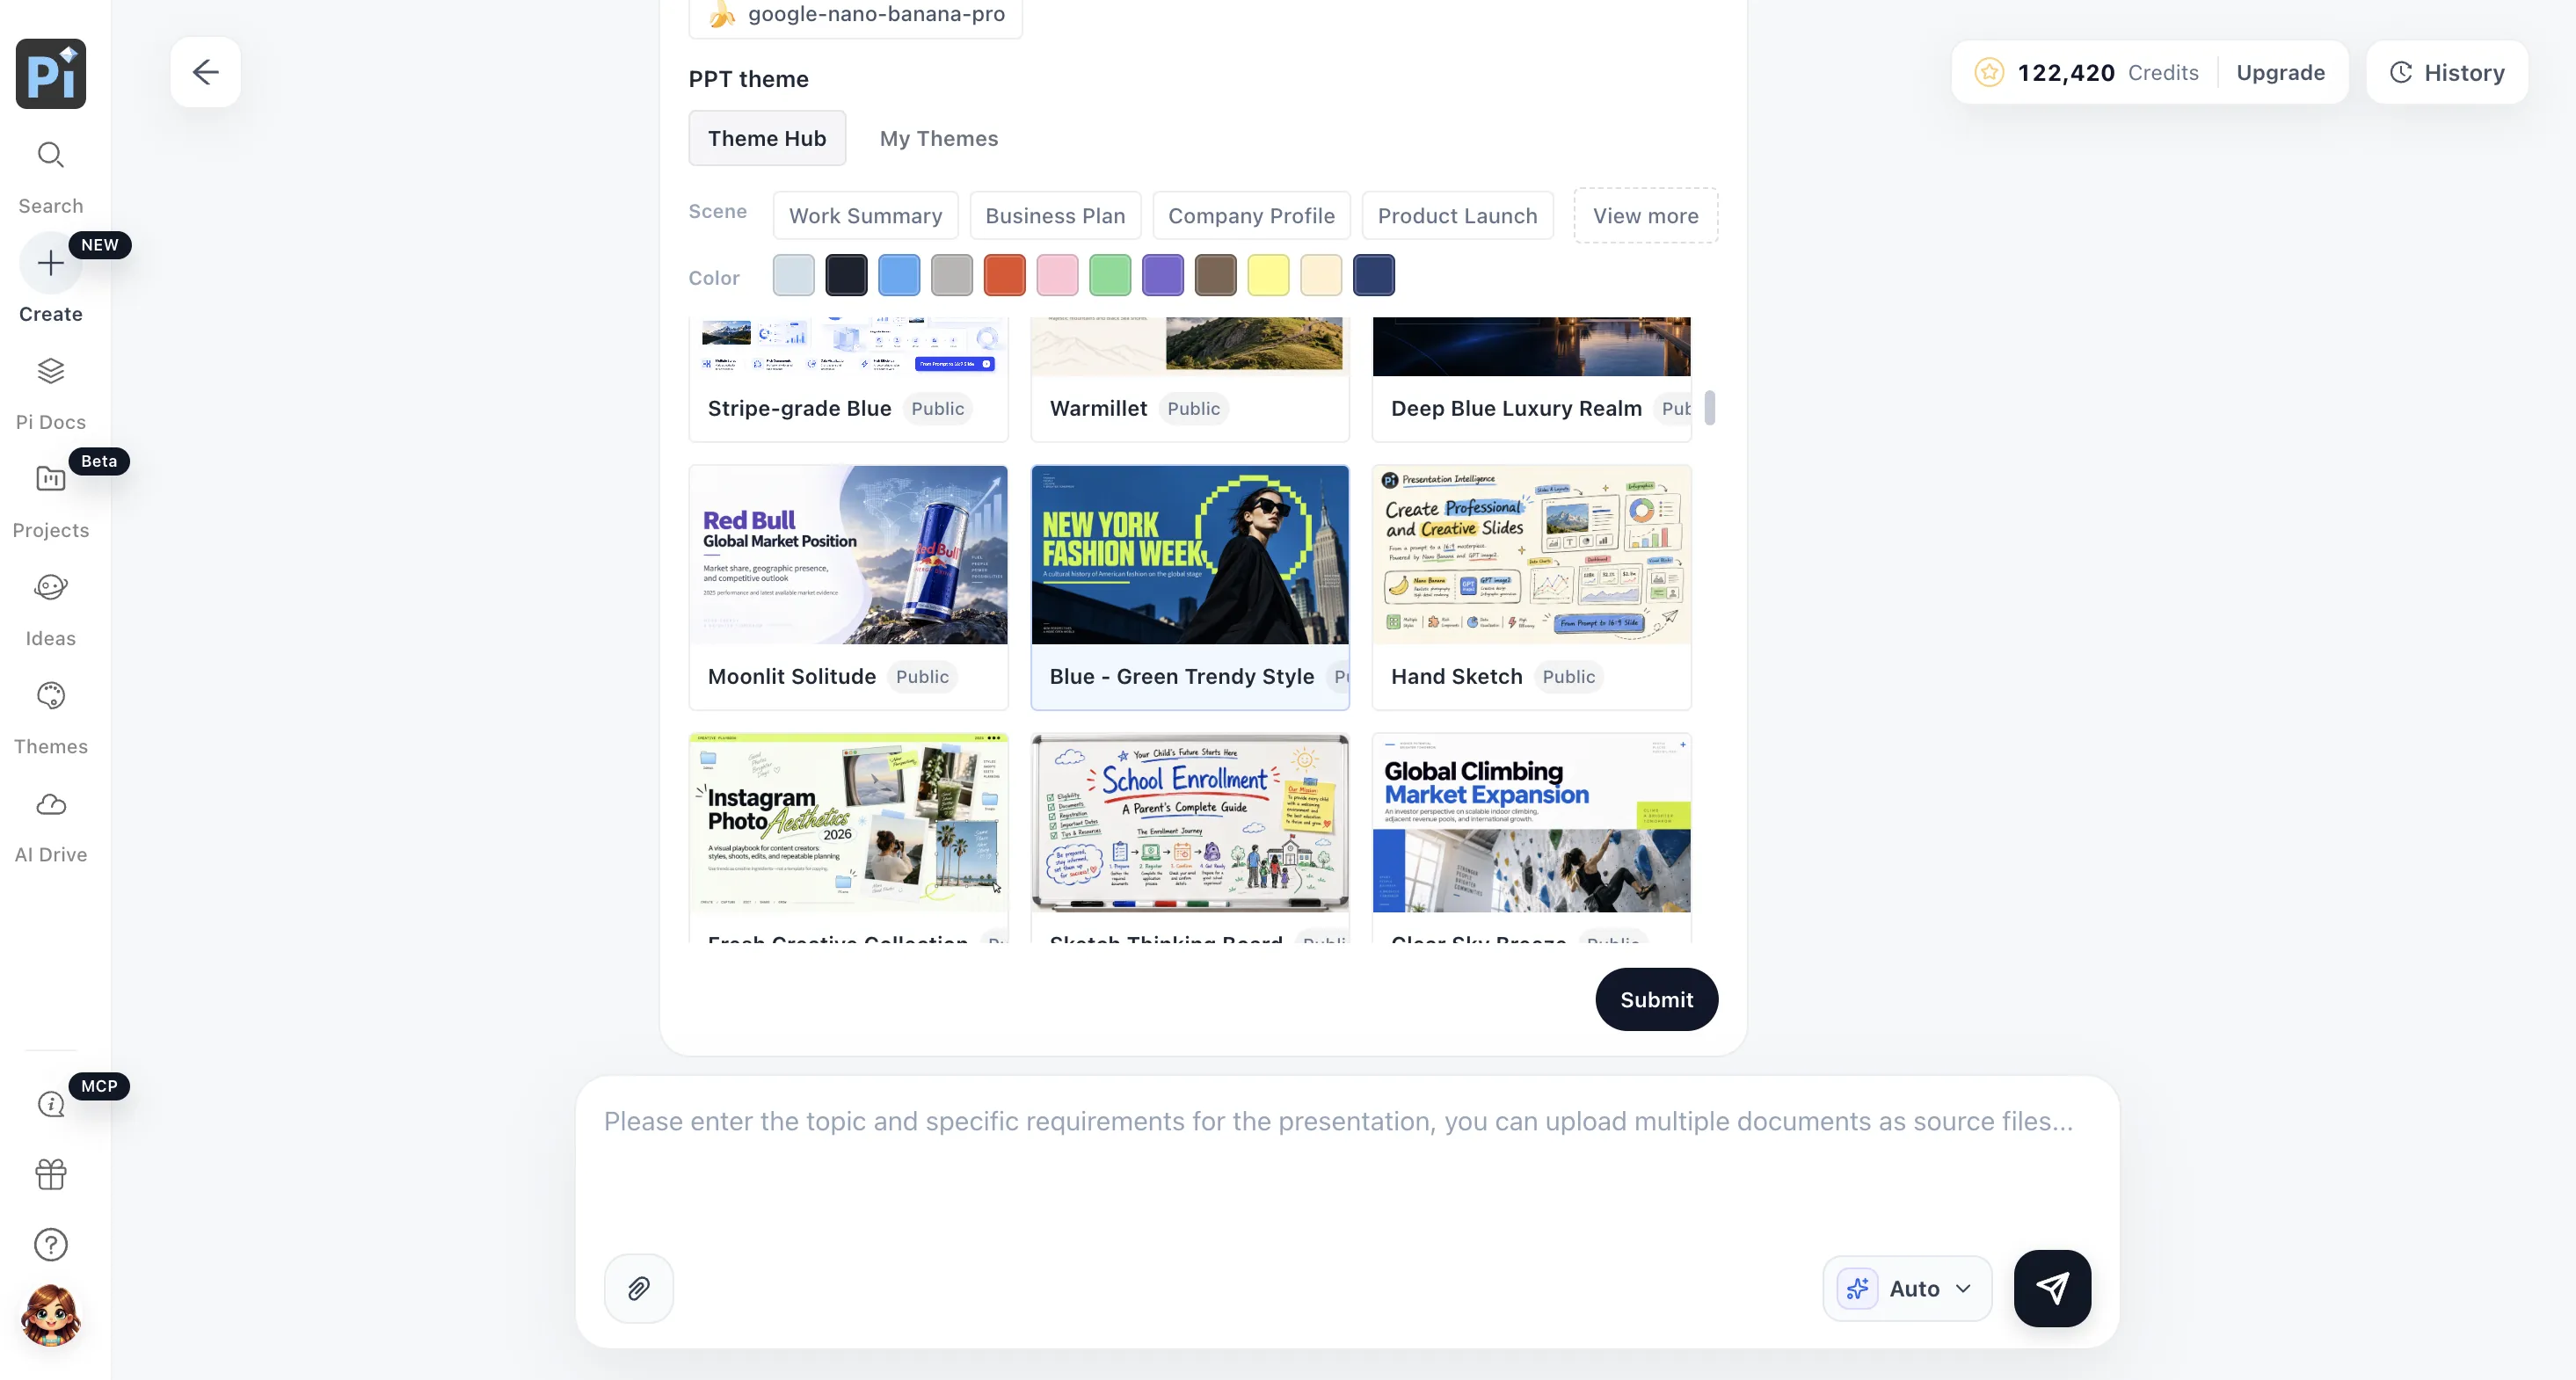
Step 3: Review the Outline and Layouts
Check the headings, sequence, key information, and brand language, then review the layout previews. Ask Pi for revisions or make adjustments in the card editor. Once satisfied, continue to generation. You can also proceed directly if no changes are needed.
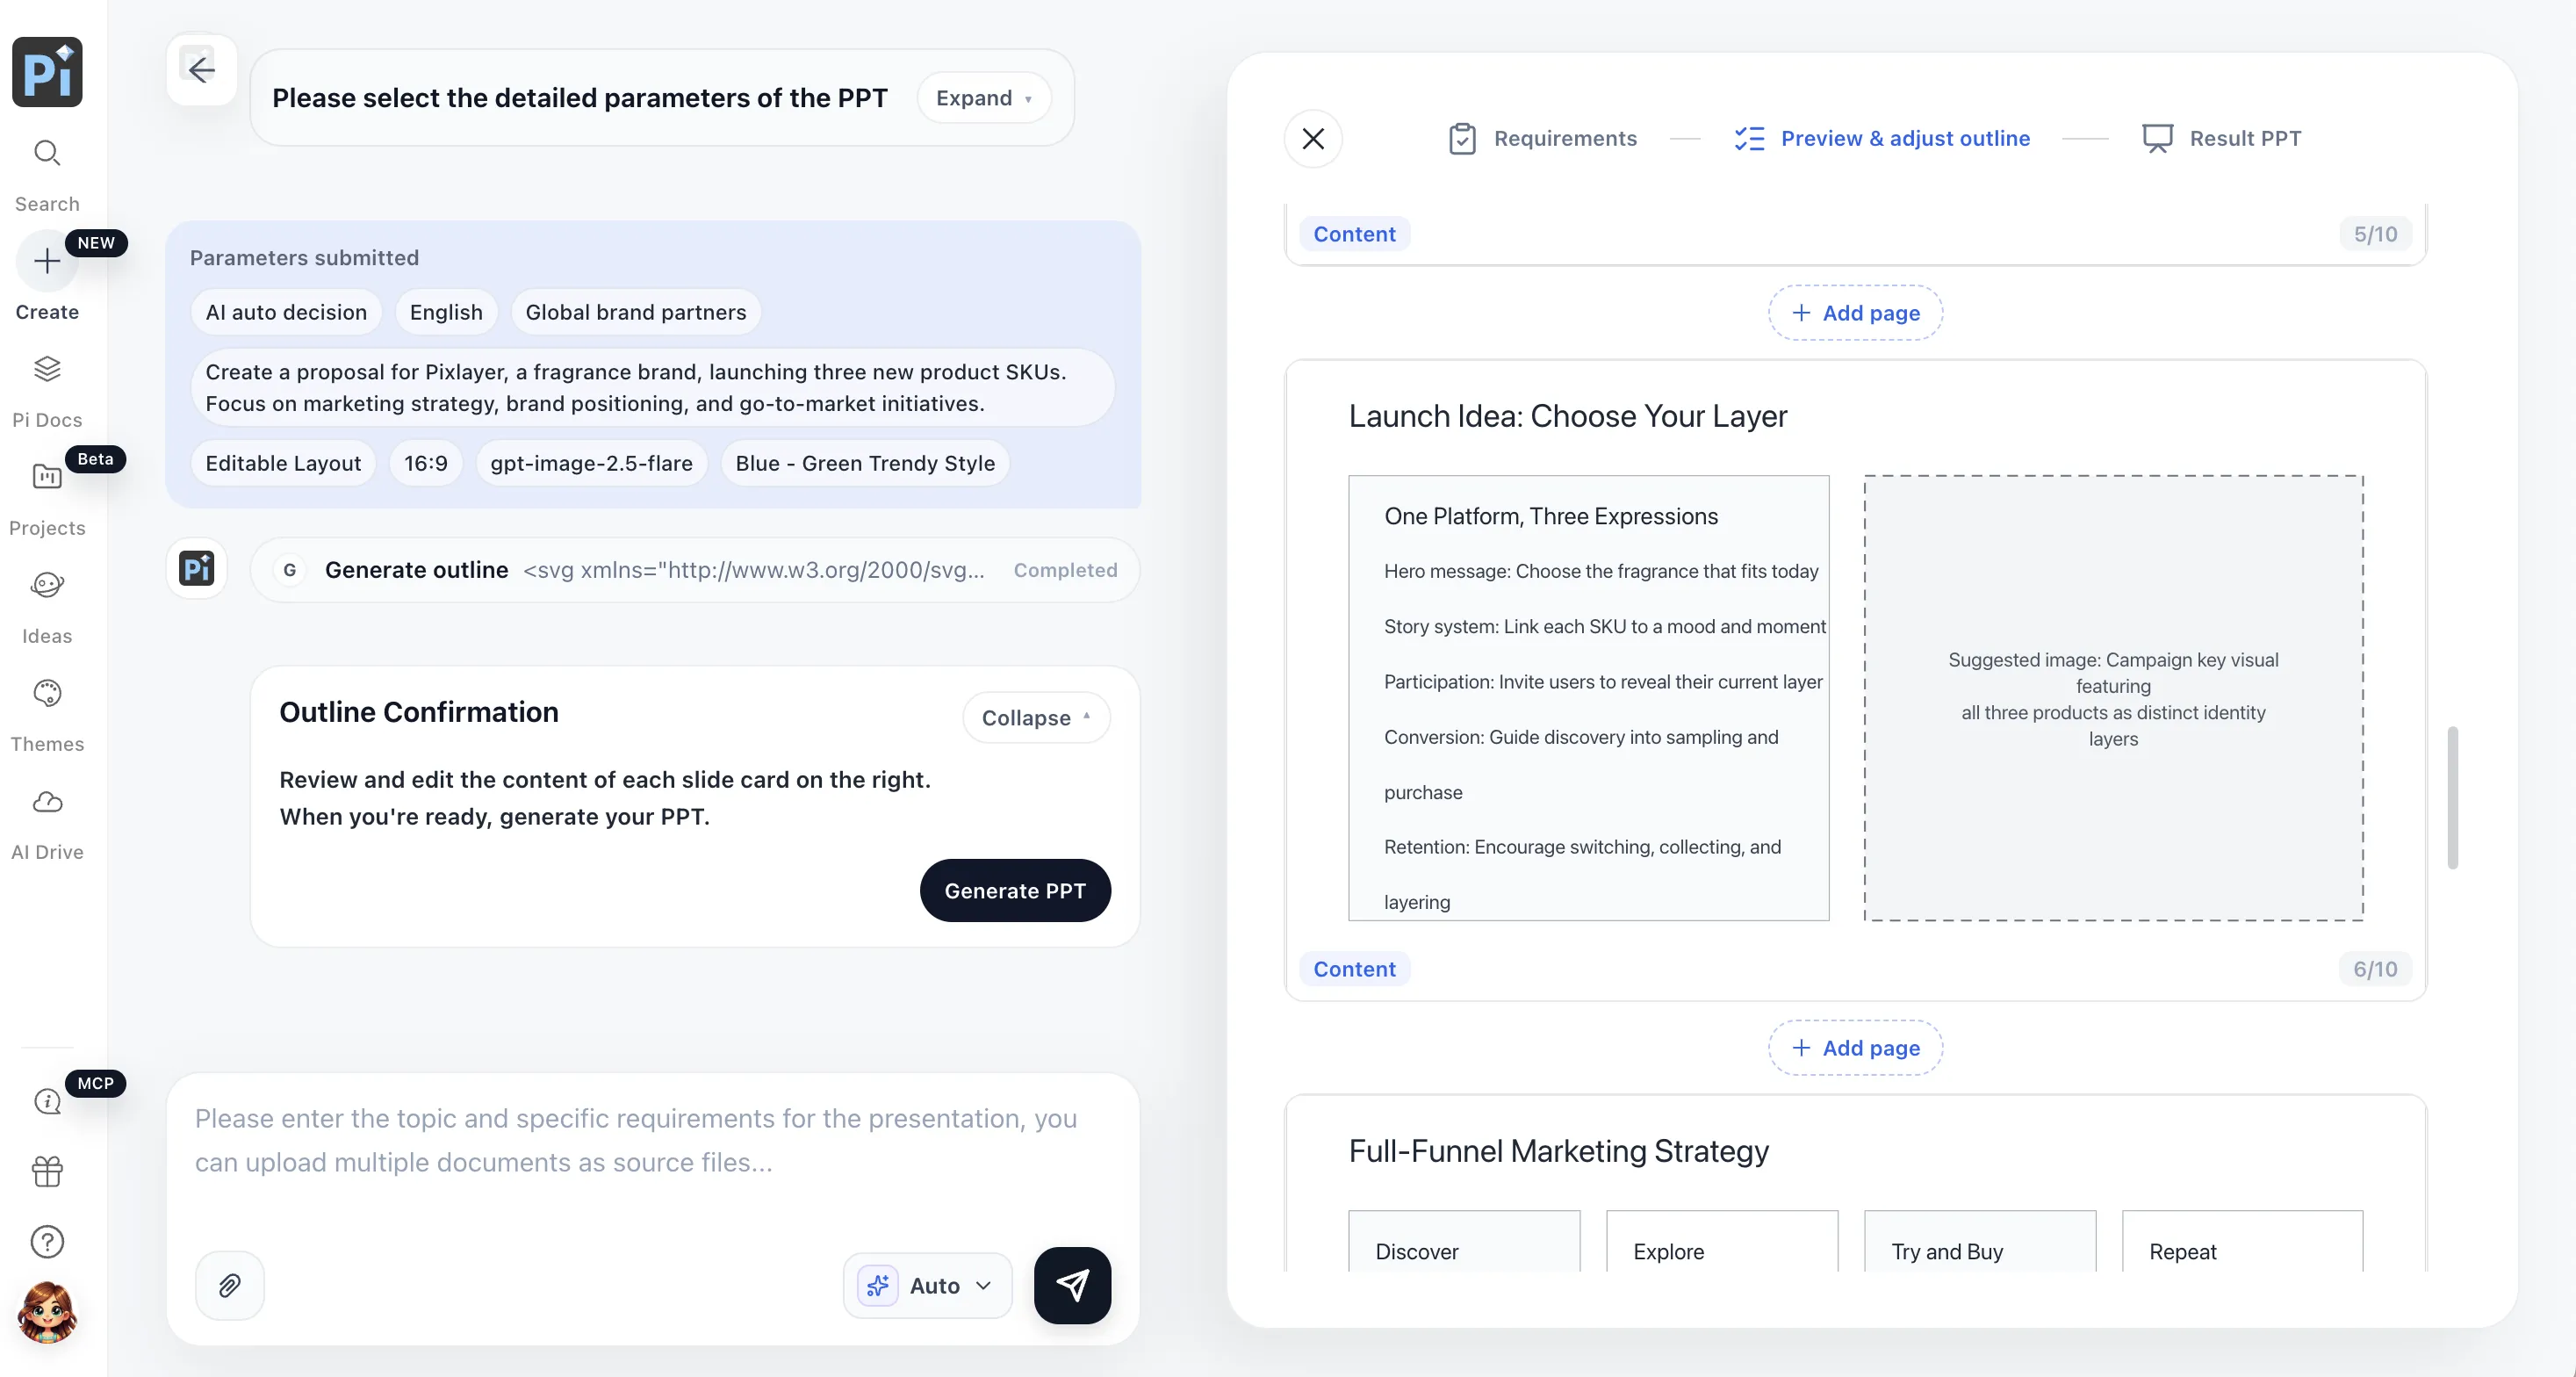
Of course, if you prefer not to make manual adjustments at this stage, you can simply choose to proceed; the Pi agent will then move on to the final PPT generation process.
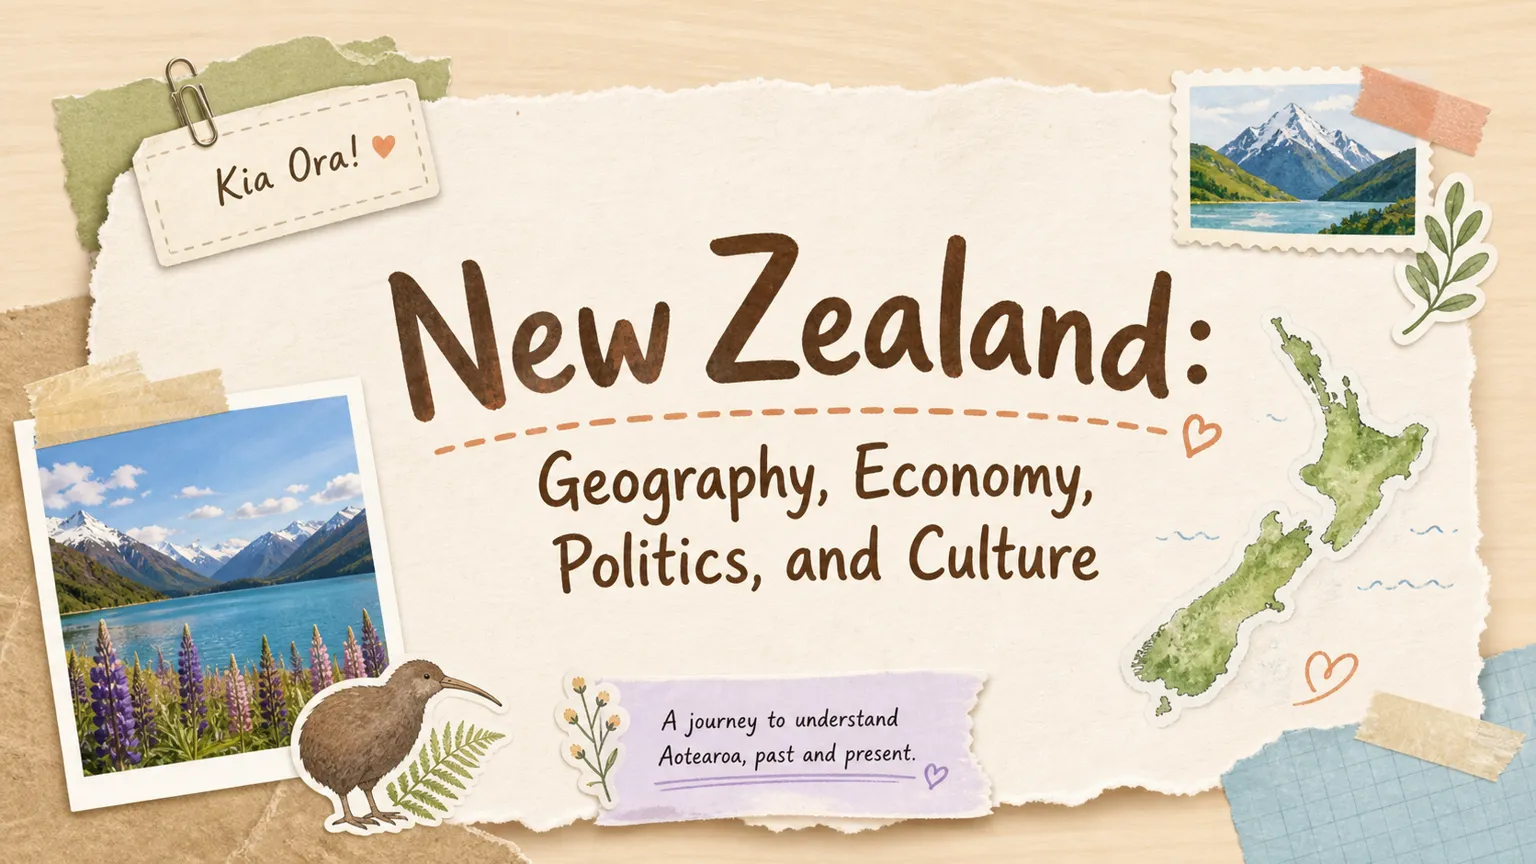
Pi’s public example, New Zealand: Geography, Economy, Politics, and Culture, illustrates this kind of visual continuity: maps, landscape photography, and illustrations create a travel-journal cover, while paper textures, colors, and decorative elements carry through the geography, politics, and culture pages.
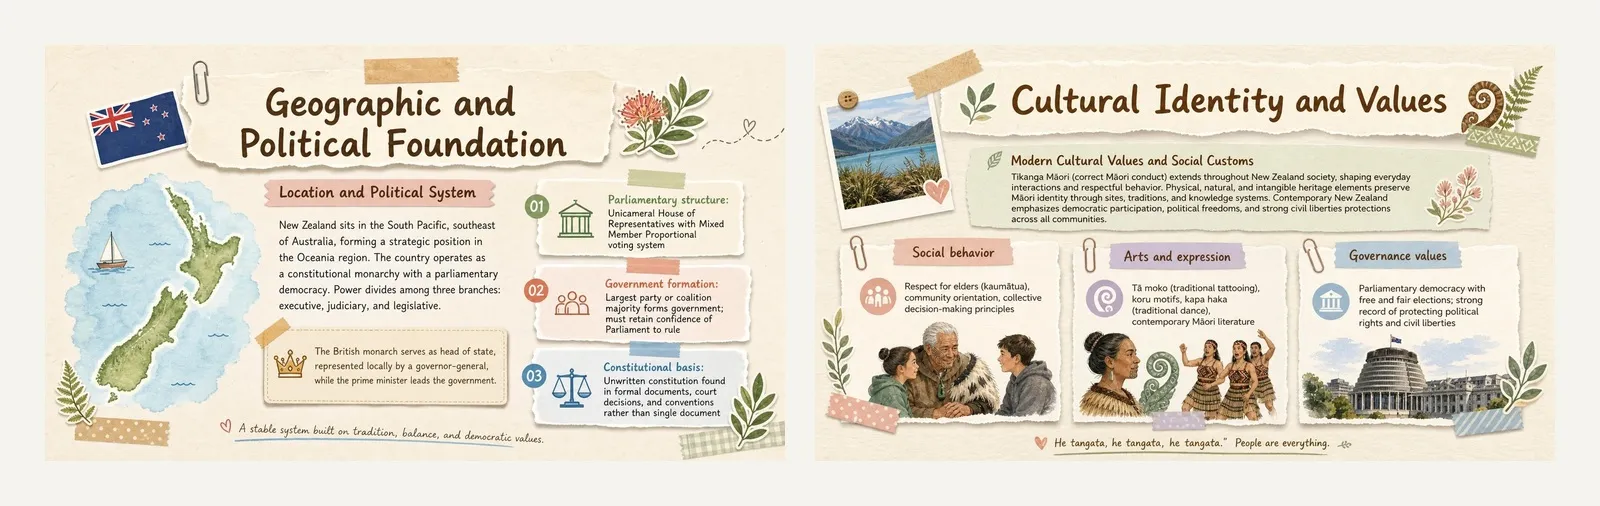
Two content pages from the same project explore, respectively, geopolitics and cultural life. Consistent paper texture, color palette, and decorative elements ensure that pages covering different themes form a cohesive visual system.
Step 4: Generate, Edit, and Export
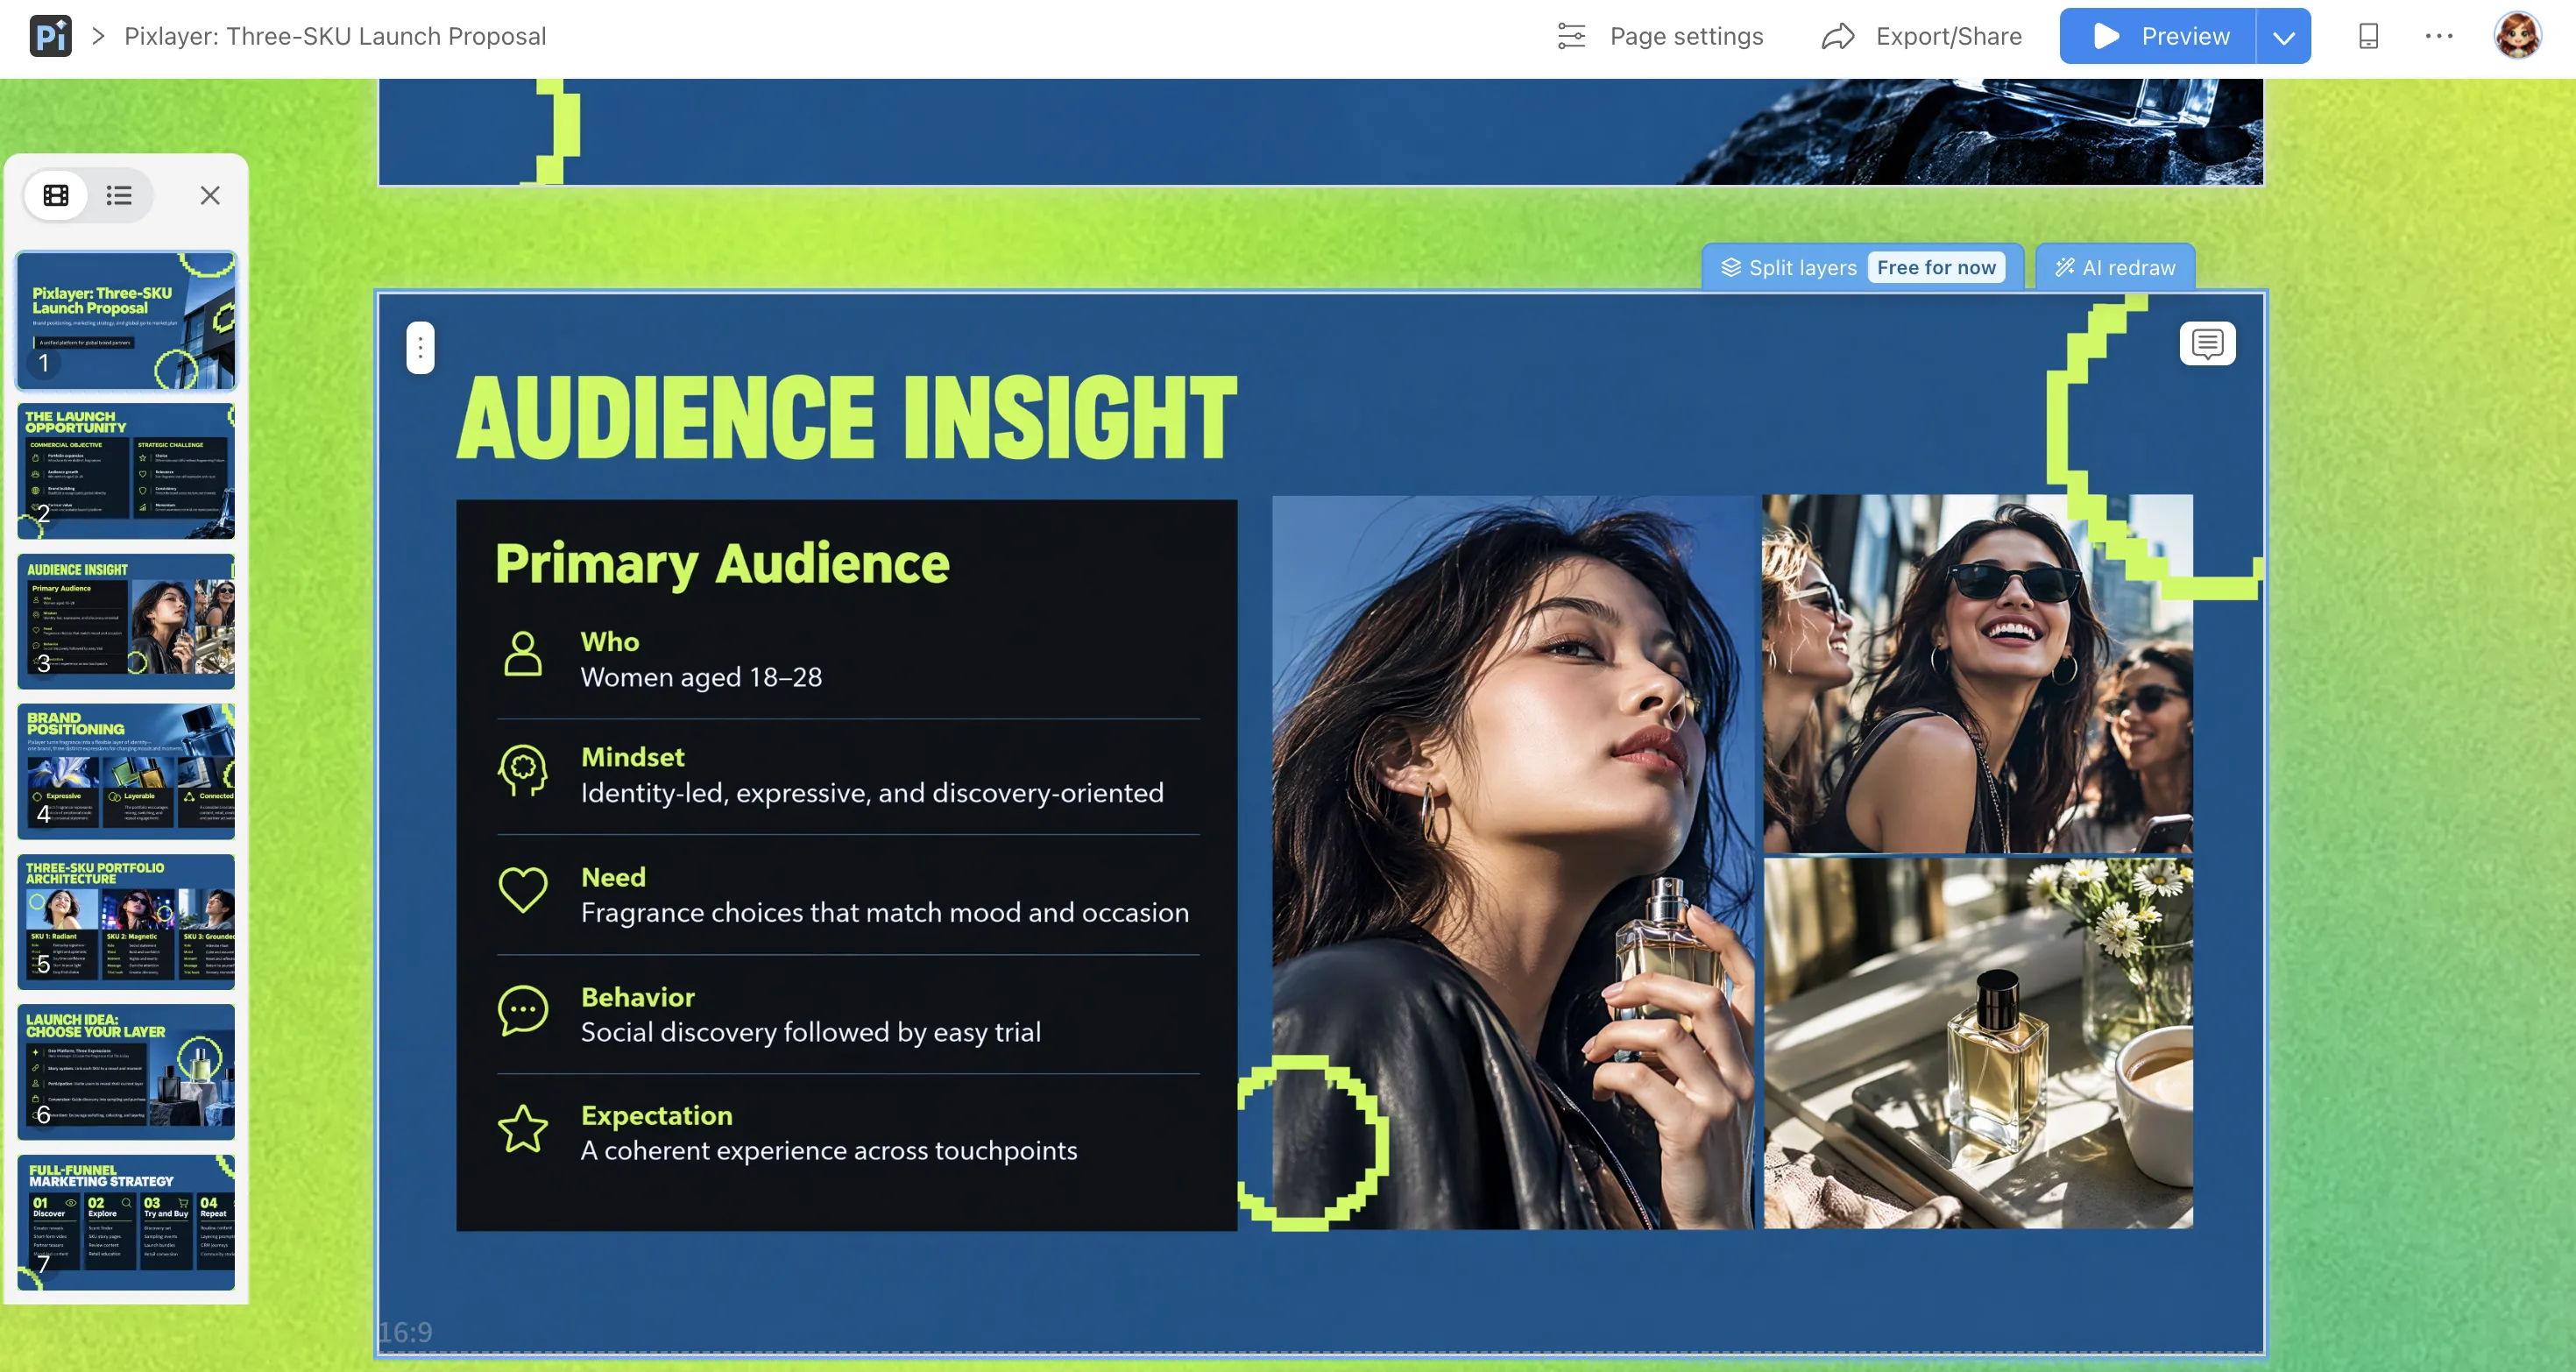
After generation, use Pi’s layer-splitting feature where needed to convert a page into an editable version, then adjust the recognized text, images, and other supported elements. After reviewing the deck, choose your format under Share/Export. Editable elements and export access depend on the current interface and plan.
The benefit is a single workflow for the whole presentation, without first completing every image elsewhere and then assembling the deck.
Which Route Fits Your Task?
| Your situation | Suggested route | Why |
|---|---|---|
| You have slide images and need to present or share them | ChatGPT or another tool with file generation | Package images into a PPTX in page order |
| You mainly need to revise headings and body copy | DeckEdit | Recognize text, revise it in the browser, and export |
| You want more elements to become editable | SlidesPilot | Reconstruct the slides and continue editing in PowerPoint |
| You have a topic or source materials and need a complete deck | Pi Creative PPT | Keep generation and export in one workflow |
| You update text, figures, and charts every week | A workflow that preserves native text and charts; evaluate Pi Creative PPT against those needs | Simplify updates and combine editable content with image-based covers where useful |
If you already have the visuals, convert them. If you still need complete pages, choose a workflow that helps create the deck as a whole. Decide what you need to deliver before opening a collection of tools.
Frequently Asked Questions (FAQ)
Can AI generate an entire slide image with text?
Yes. Image models with text-rendering and complex-composition capabilities can combine headings, body copy, and graphics in a single image. Always check small text, proper names, and numbers afterward.
Why do individual slides look good while the deck feels inconsistent?
The style instructions, aspect ratio, lighting, or composition rules may have changed between pages. Choose a visual reference, reuse a shared brief, and provide reference images where supported. Change the page content while keeping the design direction stable.
Do I need to convert the images to PDF before making a PPT?
Usually not. If you have PNG or JPG files, importing them directly into a presentation workflow is more straightforward. If your only source is a PDF, use a PDF-to-PowerPoint workflow instead.
What kinds of image-based presentations suit Pi?
Brand introductions, product proposals, creative talks, and travel stories are useful starting points. For frequently updated figures, precise data charts, or individual animations, confirm that the editing and export options meet your requirements.
Can I complete the entire process in Pi for free?
Pi offers trial credits for exploring its presentation-generation workflow. The trial scope, credit usage, editing features, and export access depend on the current product terms.
Image models make polished visuals more accessible. A strong presentation still needs a clear structure, a consistent style, and the right delivery format. Generate images and package them into PowerPoint, reconstruct editable content when necessary, or use Pi to handle the deck in one workflow. Start with the result your audience needs, then choose the tools that help you get there.